
Selection Profile Guide
Important
The optimal settings vary by software package. Coordinate the exchange format, schedule and import settings with your software supplier.
Has your Selection Profile been deactivated?
Go directly to section 5 for instructions on reactivating it
Requirements
- An active 2BA subscription.
- An account with the Superuser or Data (download) role.
- If you do not have the required permissions to create or manage a Selection Profile, contact the Superuser within your company. This is often the person responsible for IT or application management.
1. Create, view and manage a Selection Profile
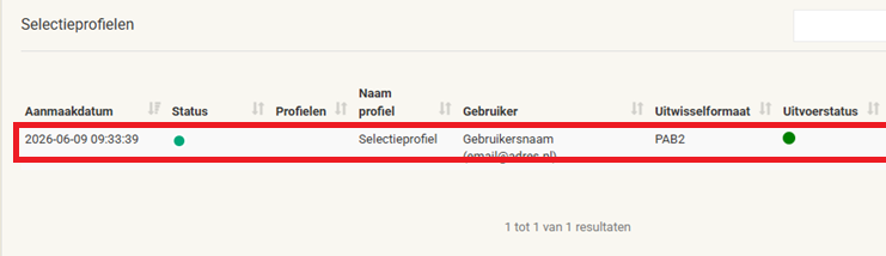
First log in to My 2BA and go to the Selection Profiles tile:
- Click the row for the Selection Profile to view or edit it.
- Or click the arrow to open the overview of all Selection Profiles.
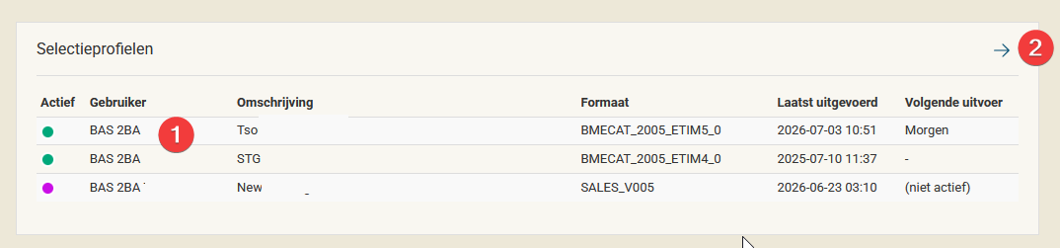
Here you can open existing Selection Profiles to view or edit them. You can also create a new Selection Profile.
1.1 Create a Selection Profile
In the overview, click “New”. This button is available to both Superusers and users with the Download role.
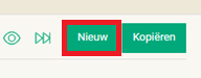
The next screen depends on how you opened the overview.
Company profiles
If you opened the page via “My company”, you can search for a user within your company. Select “Create profile for my account” to create a profile for yourself.
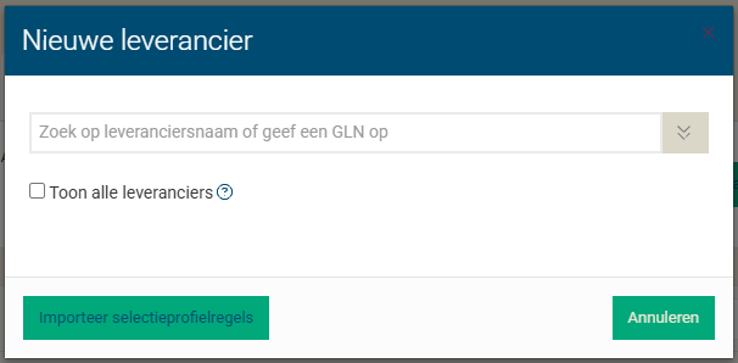
Enter profile details
After selecting a user, or when creating a profile as a Download user, enter the following details:
- The name of the Selection Profile (also include the name of your software package).
- The exchange format.
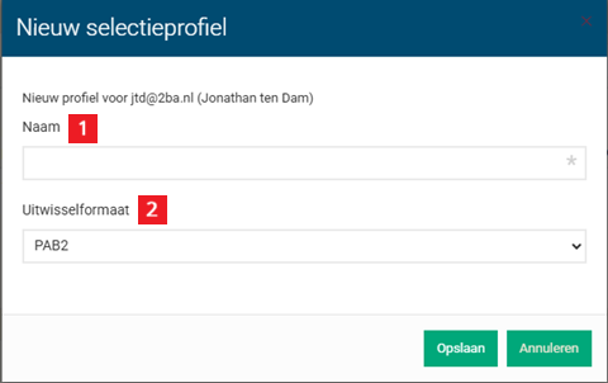
Exchange format
Ask your software supplier which exchange format is supported by your software. An incorrect format may not be processed, or may be processed incompletely.
Then click “Save”. The Selection Profile is created and appears in the overview.
2. Open and edit a Selection Profile
Open the Selection Profile by clicking the relevant row in the overview.
2.A Overview
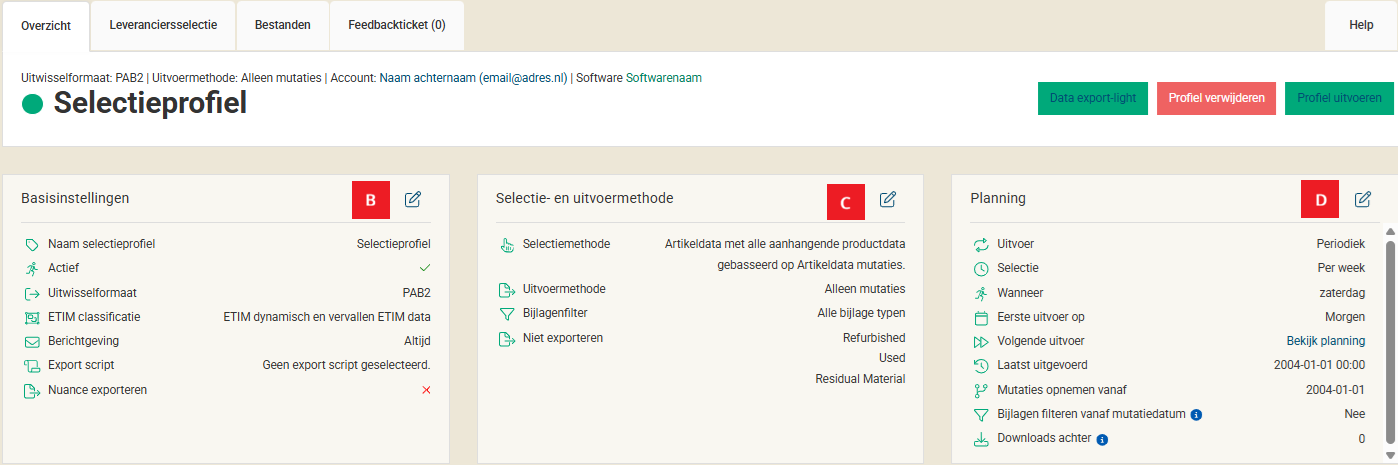
After opening the profile, you will see its overview. From here you can change settings, run the profile and manage suppliers.
Click thumbnail for a larger screenshot
2.B Basic settings
Next to “Basisinstellingen”, click the edit icon to open the settings.
Click thumbnail for a larger screenshot
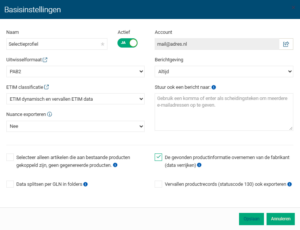
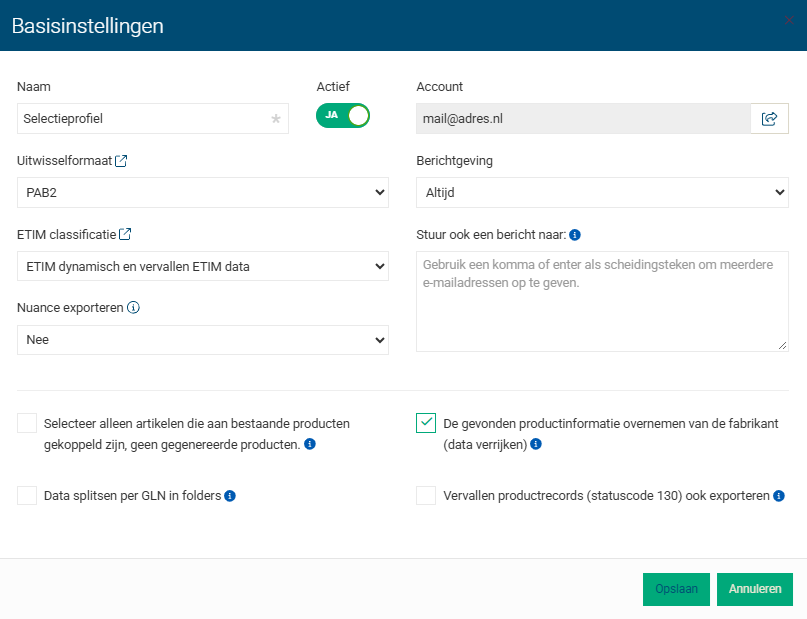
What the settings mean
- Name: the name of the Selection Profile. Give the profile a clear, recognizable name, for example “Jansen Suppliers”, rather than a generic name such as “Products” or “Wholesale”.
- Active/inactive: switches the profile on or off.
- Exchange formaat: select or change the format generated by the profile.
- Notifications: determines when you receive a notification after a run:
1.Always. This is the recommended default.
2. Only when data is found.
3. Off (no notification). - Also send a notification to: optionally enter one or more additional email addresses. Separate multiple addresses with a semicolon (;). These addresses receive a copy of the notification.
Save
Click “Save” after every change. Otherwise, your changes will not be saved.
2.C Selection and run method
Next to “Selection and export method”, click the edit icon to open the settings.
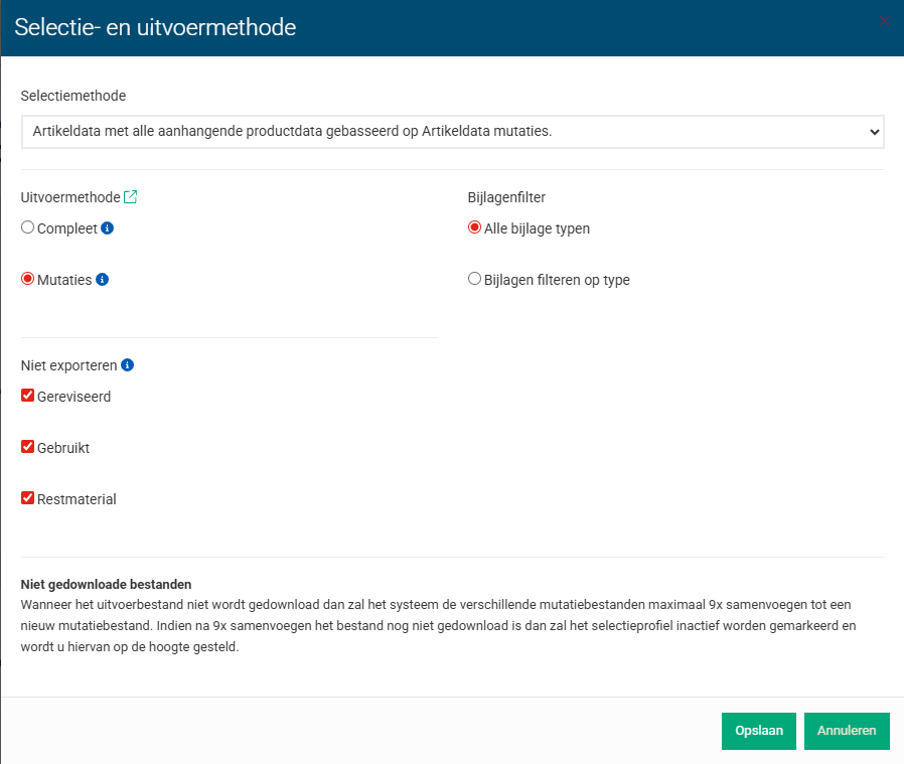
What the settings mean
- Selection method: choose whether to start from Articles or Products. If you start from Articles, you can add wholesalers or manufacturers with manufacturer articles to the Selection Profile. If you start from Products, you can add manufacturers only.
- Run method – Mutations (changes): for each selection rule, includes only changes since the configured mutation date or the last download date. This is the standard method for most software packages.
- Run method – Complete (full): includes the current assortment from the selected suppliers.
- Attachment filter: choose whether to include all attachments or only specific types. If you choose “Bijlagen filteren op type” and do not select a type, no attachments will be included.
Note
Coordinate the selection and run method with your software supplier.
2.D Planning
Next to “Planning”, click the edit icon to change the run schedule.
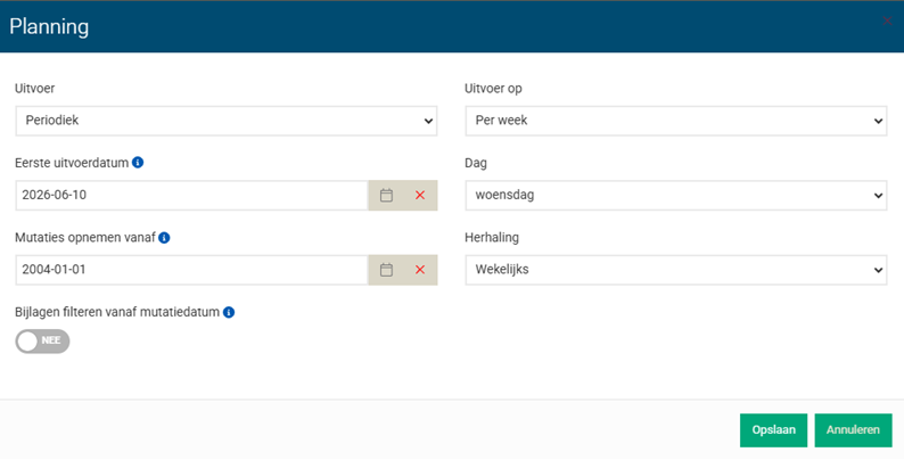
What the settings mean
- Run: choose whether the profile runs once or on a recurring schedule. To keep data up to date, at least a weekly run is recommended.
- First run date: the date on which the profile may run for the first time. Scheduled runs take place at night or early in the morning.
- Include changes from: the date from which changes are included. After each run, this date advances automatically. For a new profile, the default is 1 January 2004 so that all available data can be included in the first run. If you missed a period, set this date to the last date for which the data was processed correctly.
- Filter attachments from mutation date: when set to “Yes”, only attachments added to the product on or after the configured mutation date are exported. Older attachments are excluded.
- Run on: choose a daily, weekly or monthly schedule and select the required days or months. For a weekly schedule, you can also choose the interval in weeks. Weekly is the recommended default.
Scheduling and software import
Schedule automatic data retrieval in your software after 2BA has run the profile. This prevents your software from trying to retrieve a file before it is ready.
2.E Next run
In the overview, hover over “Bekijk planning” to see the next scheduled run times.
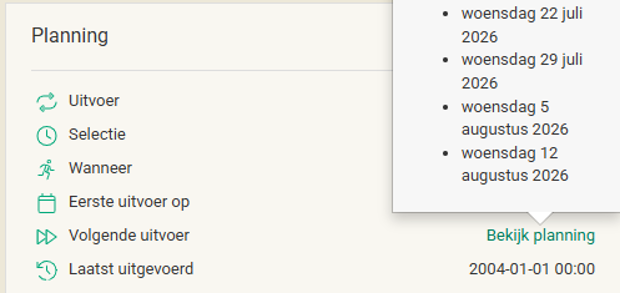
2.F Run a Selection Profile manually
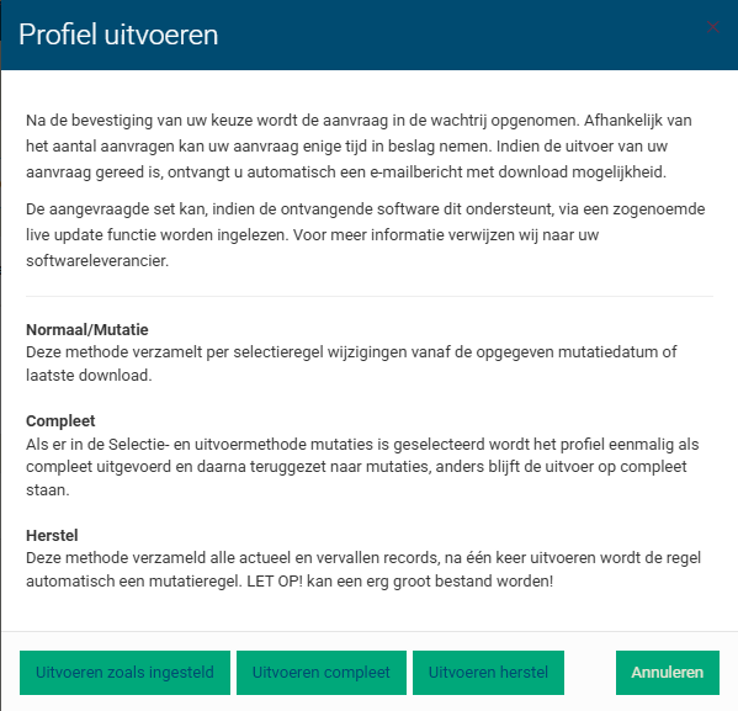
Use “Run profile” to start the profile manually between scheduled runs. This is useful, for example, when data is missing from your software or when you want to import a new supplier immediately.
- As configured: runs the profile using its current settings and configured mutation period.
- Full: includes all available article and product data from the selected suppliers. Configured attachment filters still apply.
- Recovery run: includes both current and expired records. A selection rule with the type “Recovery” is automatically reset to “Mutations” after the run. This option can produce a very large file.
Annual full run
If you run changes weekly, preferably run the profile in full once a year. This can help correct differences and gaps in your software. If in doubt, consult your software supplier first.
3. Add and edit suppliers
Open the “Supplier selection” tab at the top. This is where you manage supplier selection rules.
3.1 Add a new supplier

Click “New supplier” to add a new supplier.
Search by the supplier name or GLN. Select the correct supplier from the results.
Cannot find the supplier? Enable “Show all suppliers”. This also shows suppliers that do not yet provide data to 2BA. Once such a supplier starts providing data, it can be received through the existing selection rule.
Import Selection Profile rules
Use this option to import multiple suppliers or selection rules from a Selection Profile backup or an ICC message.
- ICC message: a file supplied by your supplier. After upload, the articles and discount groups in the file are added to the Selection Profile as filters.
Limitation of an ICC message
Articles that are not included in the conditions file are also excluded from the Selection Profile output.
- TSV file: you can download a TSV file based on your Selection Profile. The format definition and instructions are available in the 2BA-documentation on the TSV-formaat
3.2 Edit existing suppliers
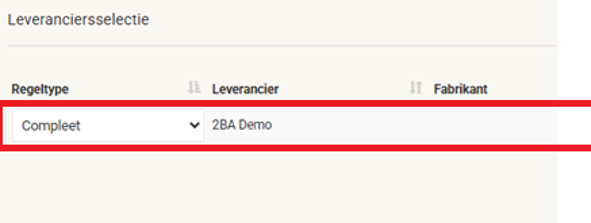
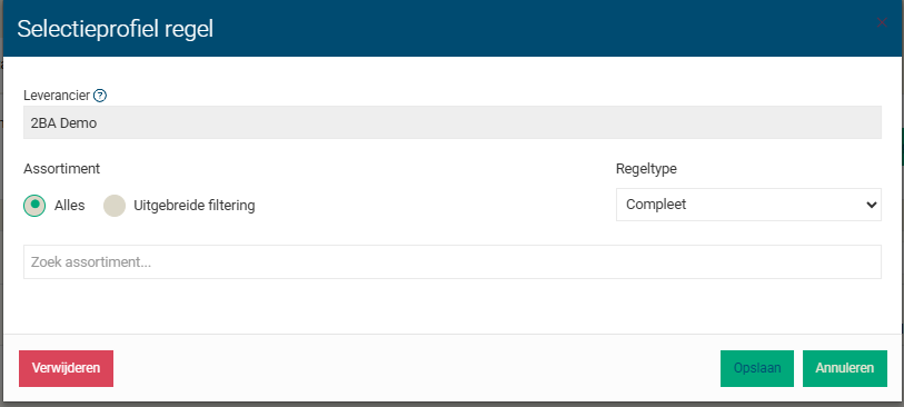
In “Supplier selection”, click a supplier row to edit its settings.
Rule type
A new supplier rule defaults to “Complete”. After the first run, the rule type automatically changes to “Mutations”.
- Complete (full): includes all available supplier data and ignores the “Include mutations from” date.
- Mutations (changes): includes changes from the mutation date or from the profile’s last run.
- Herstel (recovery): includes the current assortment as well as expired products and articles. Expired records include products with the status “expired” and deleted articles that remain in the 2BA Datapool for historical records and references.
Notes on Recovery
- The PAB2 exchange format does not support the status code “expired”. Check the settings under “Basic settings”.
- The recovery rule type can only be used when the Selection Profile run method is “Mutations”. After the run, the selection rule is automatically reset to “Mutations”.
- A recovery run can generate a very large output file.
- Data for discontinued articles and products may remain available in 2BA for product history and for trade records that refer to them.
3.3 Supplier filters
Within a supplier’s settings, choose which data from that supplier should be included.
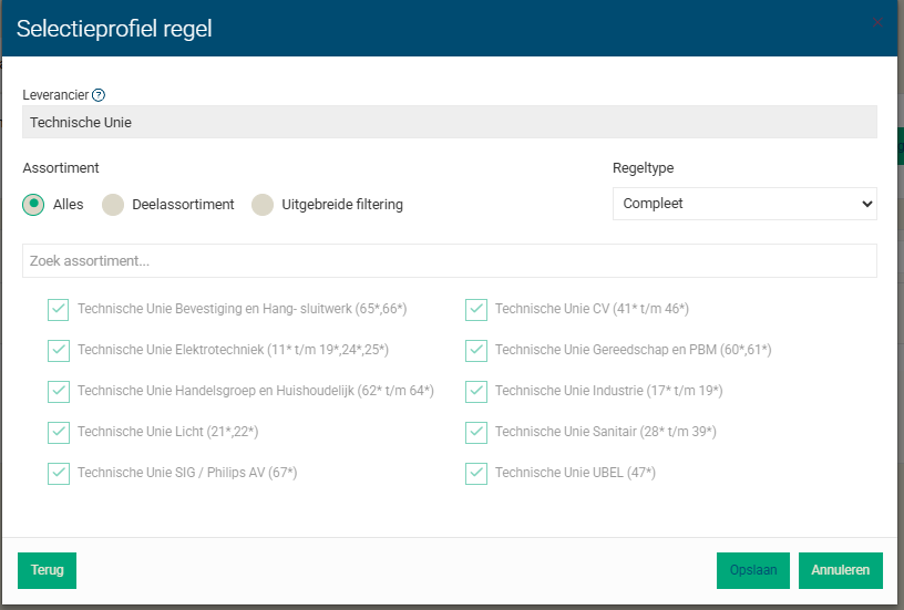
- All: includes all available product and/or article information from the supplier.
- Partial assortment: filters on a partial assortment offered by the supplier, for example cables only. Not every supplier supports partial assortments. Ask the supplier which options are available.
- Extended filtering: filters on one or more attributes. You can enter multiple values for discount groups. Wildcards are allowed in fields marked with an asterisk.
3.4 Extended filtering
For extended filtering, at least one of the following fields must be completed for each selection rule: Brand, Discount group or Article code.
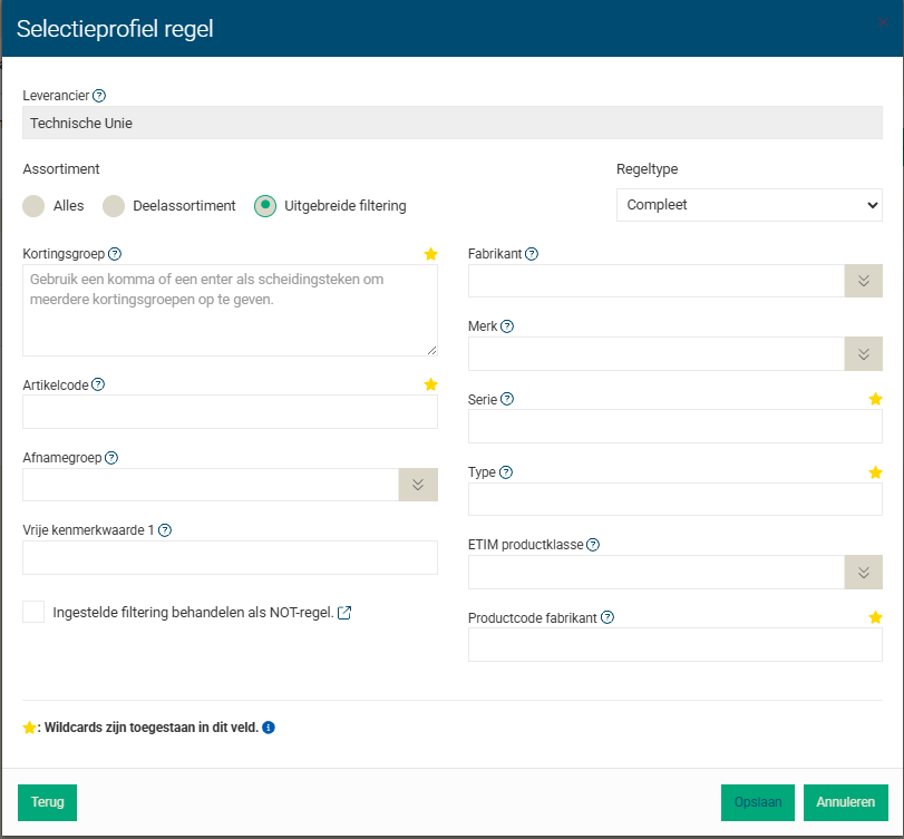
Click “Save” to save the changes. “Cancel” discards changes that have not yet been saved.
Operational notes
- A scheduled Selection Profile normally runs at night or early in the morning, typically between 00:00 and 06:00.
- A Selection Profile is deactivated after it has run ten times without the generated file being downloaded.
- If multiple mutation files are not downloaded, the changes are merged. One file then remains available containing all changes since the last downloaded file.
- You can also use NOT rules to remove matching articles from the final output.
3.5 NOT rules
A NOT rule works like a regular selection rule, but excludes the matching data from the output.
Example
- Add a selection rule for the complete assortment and choose “Everything” under filtering.
- Add the same supplier again as a second selection rule.
- In “Allowance group”, enter the value to exclude, for example 13*.
- Enable “Use enabled filtering as a NOT rule””.
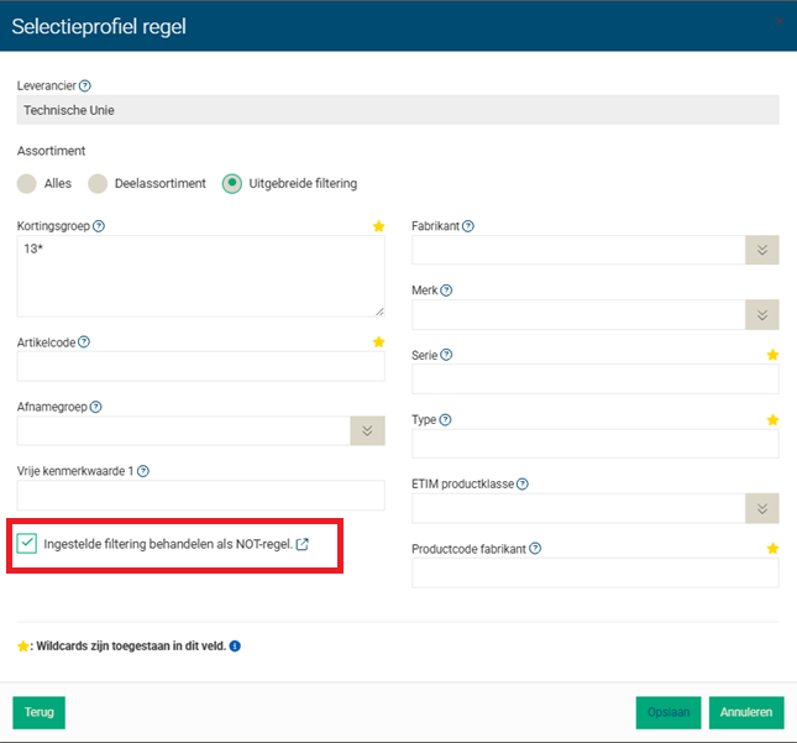
Result: the profile includes the supplier’s complete assortment except for discount groups that begin with 13.
4. Files and processing
BZip2-compression
Exported files are compressed with BZip2. Windows cannot open these files by default. Preferably process them directly through your software package.
Automatic processing
If your software can retrieve Selection Profile files automatically, use that option whenever possible. This reduces the chance of missed files and helps keep your data up to date.
Schedule retrieval for the same day, but after 2BA has run the Selection Profile.
Example
If your Selection Profile runs every Thursday, schedule your software to retrieve the file on Thursday evening, for example between 18:00 and 23:59. Ask your software supplier which times and settings are recommended for your package.
Manual processing
After each run, you receive a notification containing a link to the file. Download the file and import it according to your software supplier’s instructions.
The “Files” tab shows which files are ready. You can also delete files that have already been processed.
5. Reactivate a deactivated Selection Profile
Have you received a notification that your Selection Profile was deactivated? Follow the steps below.
Step 1: process files that have not yet been downloaded
First import any files that are still waiting for you. In many cases, your software can still retrieve them. Contact your software supplier for the correct procedure. If the data is significantly outdated or files are missing, you can start a full run after reactivation.
Stap 2: open het selectieprofiel
Log in to https://my.2ba.nl/ and open the Selection Profiles overview. A deactivated profile is marked with a purple dot. Click the row for that profile
Step 3: activate the Selection Profile
On the “Overview” tab, click the edit icon next to “Basic settings”

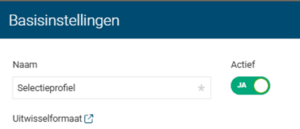
Set “Actief” to “Yes” and save the change.
Reactivate only after processing the latest file
Reactivate the profile only after the latest prepared file has been downloaded and processed. Otherwise, the profile may be deactivated again on the next run.
Step 4: run the profile in full if necessary
If you have not received data for some time, preferably run the profile in full. In the overview, click “Run Profile” and choose “Run complete”. See section 2.6 for the available run options.
After the run, you will automatically receive an email notification.
Tips
- File cannot be processed: a change to the operating system, security software or import settings may block processing. Contact your software supplier.
- Forgotten password: request a new password from the login page. If you change the password, also update it in any software that automatically retrieves files from 2BA.
6. Feedback system
If you have a question, comment or problem with your Selection Profile, create a feedback ticket. Open the “Feedbackticket” tab and click “New”.
- Use a short, clear title that reflects your question.
- Describe the situation as completely as possible and include examples where relevant.
- Add CC recipients if needed. They will also receive ticket updates.
- For a detailed question, attach a document if helpful.
7. Buttons and functions
 | Edit settings |
 | Run profile |
 | Show direct profiles |
 | Show deleted profiles |
 | Create feedback |
 | Delete profile |


